Before I start I want to give a shout out to everyone who
read and shared my last post! I am blown away by the response. Within 48 hours of posting it, the post had been viewed over 3000 times and shared on some of my favorite blogs and facebook pages, including "Really, What Were We Thinking?" and, "Mamasphere!" Wow! I’m thrilled to have gained
some new readers, and hope that those who came here because of that article
will stick around for our regularly programmed posts. ;)
That said, Happy New Year, folks! We’re a little over a week
in to 2014- anyone else already fucked up their resolutions? No? Just me? Kay.
In all seriousness, though, I’m not much for resolutions.
Too much pressure. I do have some general goals for the year- like maintain my
weight loss, continue to post here, and try to keep my children alive for
another year. I’d also like to survive the process of moving 2 adults, 2 kids,
and a dog into a house that will probably be undergoing some form of renovation
the entirety of our time there.
Did I mention yet that Brook and I are becoming home owners?
Pretty stoked about that. Look how pretty this house is. We’re going to LIVE
there. And pay a mortgage. Like grownups or something. Weird.
Since I haven’t attempted anything blog-worthy this week but
wanted to post anyway, take a look at one of my projects in 2013- a dress up
chest for my daughter’s birthday.
SJ loves dressing up in fun costumes. Considering she spends
almost all of her time at home half naked, this is a little ironic- but
whatever. I just roll with these things now.
For her birthday I hunted high and low for a suitable chest
for this project. I found this one at Goodwill for $6!! It had already been
painted once and was not what I had in mind, but armed with spray paint and
glitter stickers I went for it.
The first step was to spray paint the entire thing. I
underestimated the amount of spray paint I would need. It took almost two cans
to get it evenly covered, but you might have better luck if you can find a bin
that hasn’t already been painted a dark color.
PRO TIP: after spray painting, let the bin dry overnight.
Otherwise it’ll be really tacky and start to peel up when you decorate.
After you’ve let it dry, decorate as you like! I didn’t
trust my paint brush skills so I bought a purple paint pen to do the outline of
the lettering. Then I filled in with regular acrylic paint.
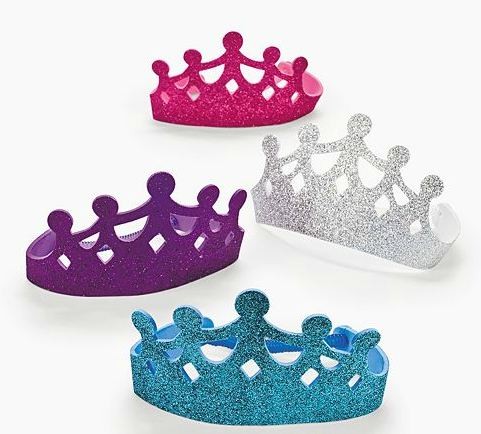
I made a run to Wal-Mart and bought one of those foam
glitter crowns for 99 cents and a bag of glittery stars and hearts for $1.50. I
only needed a handful (didn’t want to go overboard with the decorating) and
still have a huge bag left for future projects.
I cut the wrap around part of the crown off and used heavy
duty craft glue to adhere it to the top of the bin, and did the same with the
stars. Even though the stars had their own adhesive, the craft glue is a must-
we call SJ Destructo Baby for a reason…
And just like that VOILA! Dress up chest!
Sarah Jane’s
birthday is right around Halloween so I was able to scoop up costumes on the
cheap as big box stores slashed prices to move the inventory by the 31st.
This is a good time of year for that too. Check out Spirit Halloween’s
sale/clearance section for kids costumes under $10. There are a ton available
like this Dora costume for $4.97
and this Speed Racer one for $6.97.
To my horror, when looking through the clearance section I
stumbled upon this:
Like it isn’t bad enough that a “Phat Pimp” costume exists (oh, hello,
misogyny! You’re still here, huh?) but why the fuck would you make that a CHILD
SIZED costume? Ugh. Fuck me sideways, 2014, we’ve got a lot of work to do.
Anyway, the dress up chest was a huge success at her birthday party, with all of her guests trying on at least one costume while they were here. And Sarah Jane got some use out of it almost immediately- Disney on Ice came to town the next week and she was so excited to wear her Minnie Mouse costume!
~~~~~~
Love the idea and want to try it yourself? Pin this before and after pic as a reminder and make sure to comment with your version when you finish!


Great job with the chest!
ReplyDeleteThanks, Paula!
DeleteGreat job! Did the paint stay on? I painted a chair over the summer and when it get bumped the paint comes off/scratches. I sanded and everything!
ReplyDelete